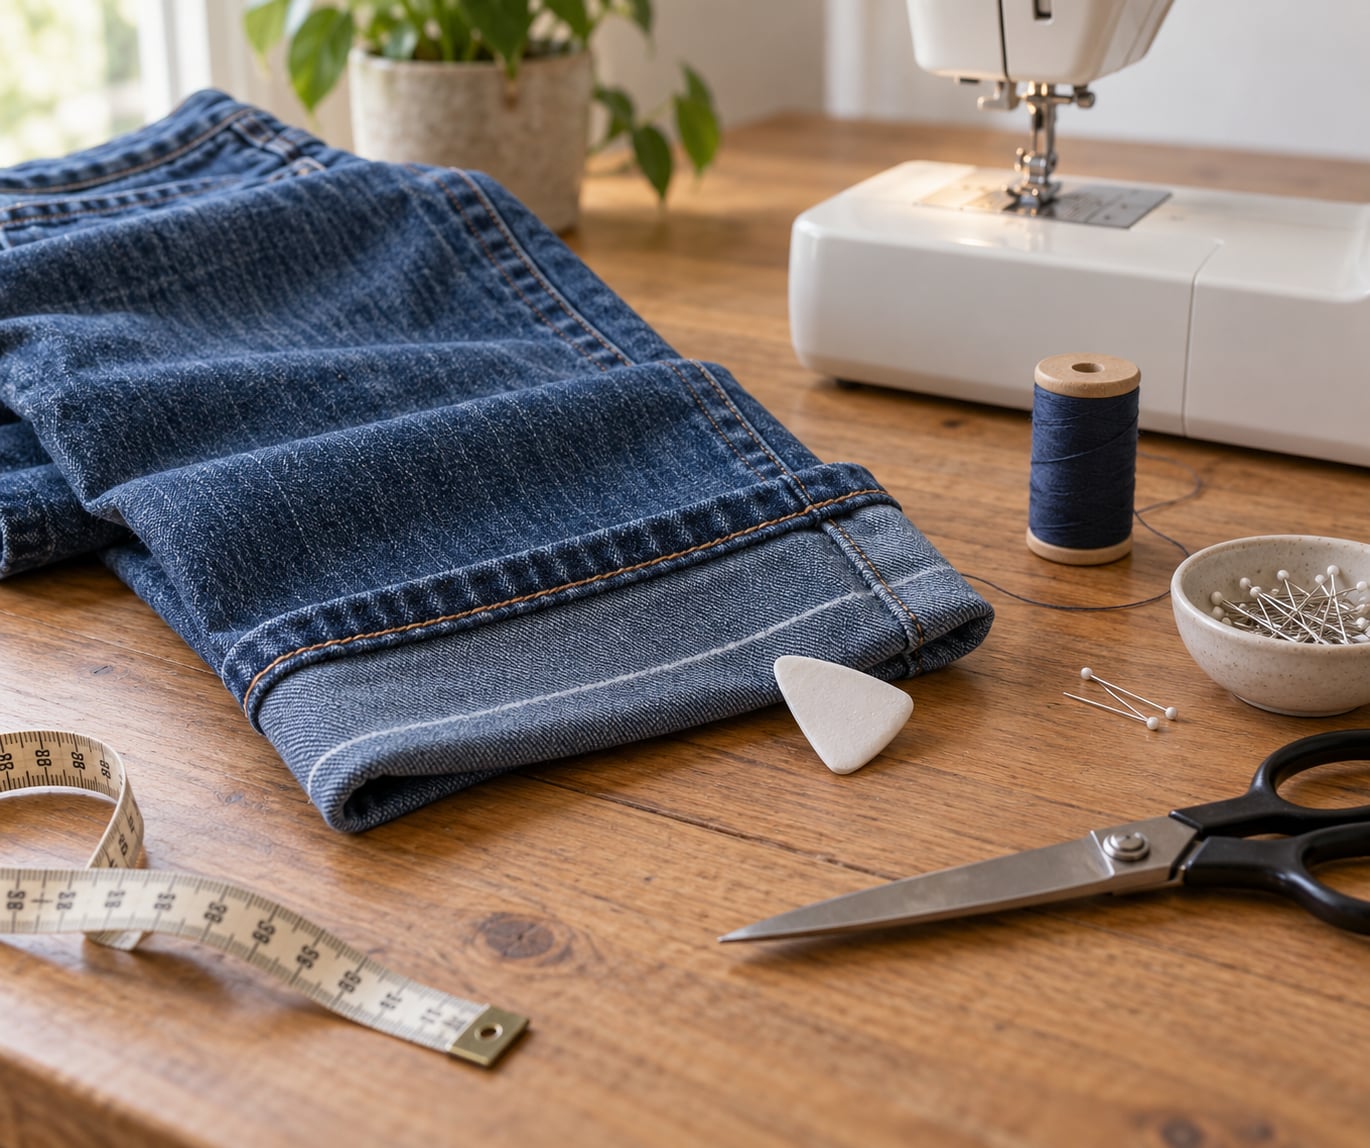
Hemming jeans without losing the original edge means you cut the extra length off above the factory hem, then fold that hem back up and stitch it in place. The finished bottom keeps the denim’s original stitching, its chain-stitched detail and the faded or distressed look that came off the cutting table, so the jeans still read as factory-finished after you shorten them. Budget about 30 to 45 minutes the first time and go slowly at the marking stage.
The whole job rests on one idea: the original hem is a flap of denim that is already sewn closed at the bottom. You are not cutting a new edge. You are opening nothing, removing nothing you want, and simply re-sewing the existing hem higher up the leg.
Here is the short version before the detail. Decide the length, mark it, fold the original hem to the inside so its raw edge sits on your mark, pin it, sew right next to the factory stitching, press it hard, then trim the loose denim hiding inside the leg.
What You Need
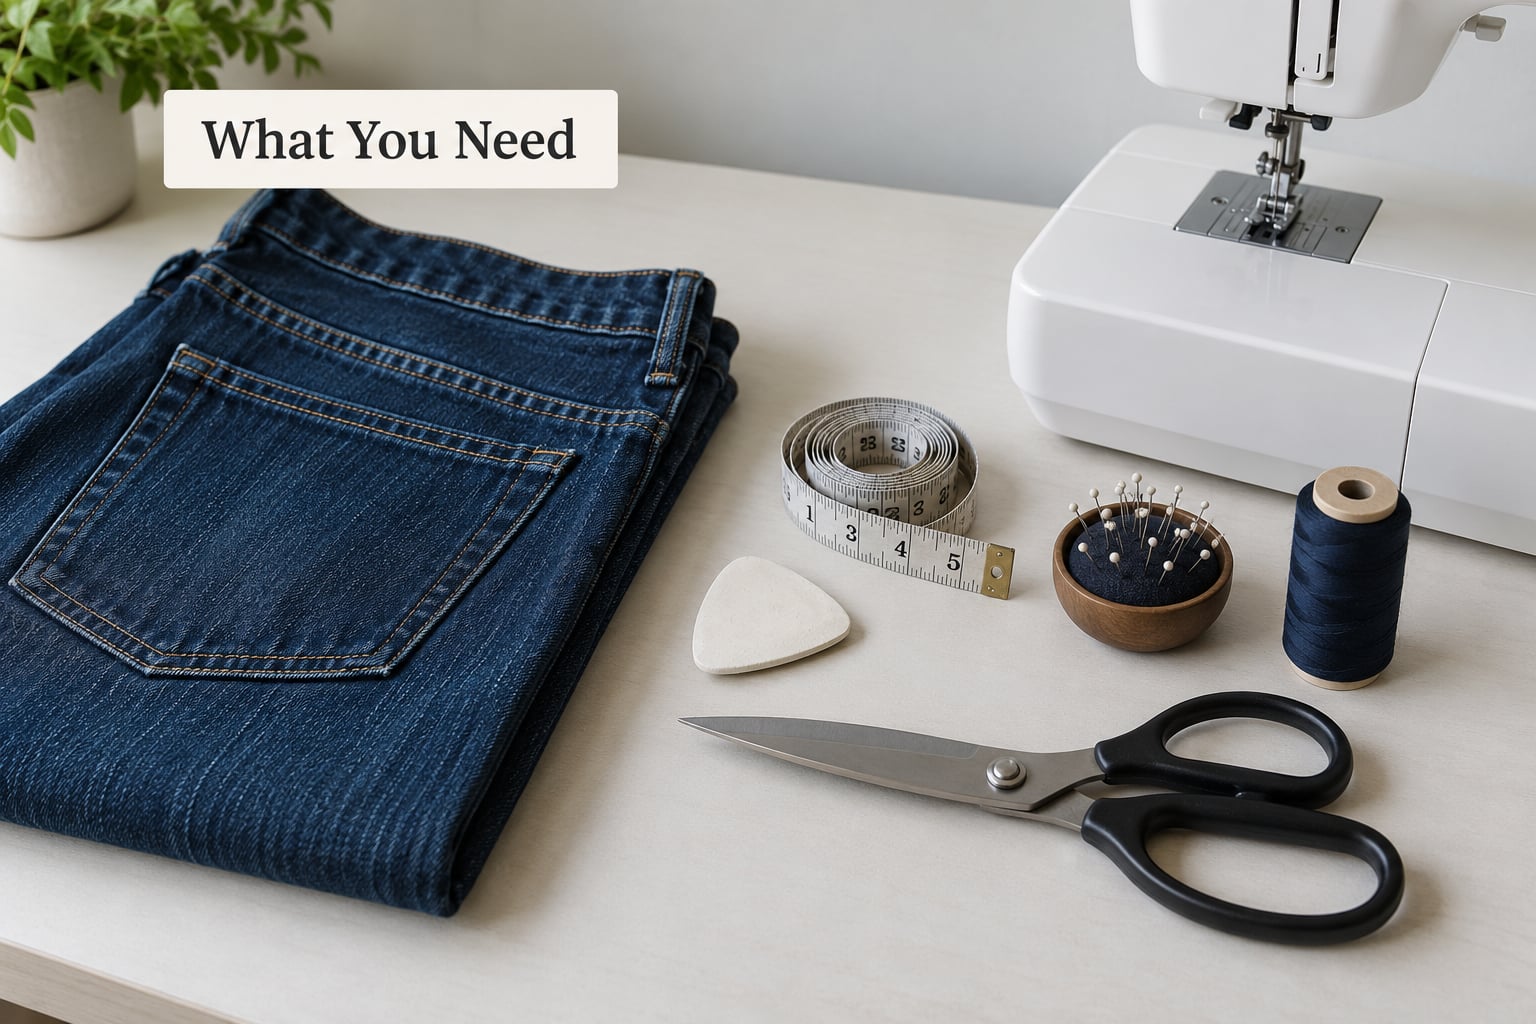
The tool list is short and most of it you probably own already.
- Measuring tape for the inseam and the finished break.
- Tailor’s chalk or a washable fabric marker for marking on denim, which is too dark for pencil.
- Straight pins, plus a pincushion within reach of the machine.
- A sewing machine with a zipper foot and a bulky seam jumper for the thick side seams.
- A denim needle, size 16/100, because a standard needle bends on heavy cotton.
- Heavy thread in a colour that matches the existing topstitching, usually a gold or grey tone.
- Sharp fabric shears and optional pinking shears to stop the cut edge from fraying in the wash.
- An iron and a clapper or tailor’s ham for the final press.
Wash the jeans first, following the care label, and dry them the way you normally would. Denim shrinks in the wash and often shrinks again with heat, so hemming before that happens means you are sewing for a length you will never actually wear.
If you are hemming for a child, leave a few inches of extra length on purpose and secure the hem with hand stitches at both side seams so it can be released later without unpicking machine stitching.
Step-by-Step: How to Hem Jeans Without Losing the Original Edge
1. Decide the Finished Hem Length
Put the jeans on with the shoes and boots you actually wear with them, then decide where you want the bottom edge to land. A small break across the top of the foot is the classic denim finish, and it reads well with sneakers and with boots alike.
Have someone mark the spot on each leg with a pin while the jeans are on you. Measuring a moving body on yourself is how people end up with two different lengths. Walk around, sit down, and check that both pins sit at the same height before you take anything off.
2. Turn Up the Original Hem and Mark the New Line
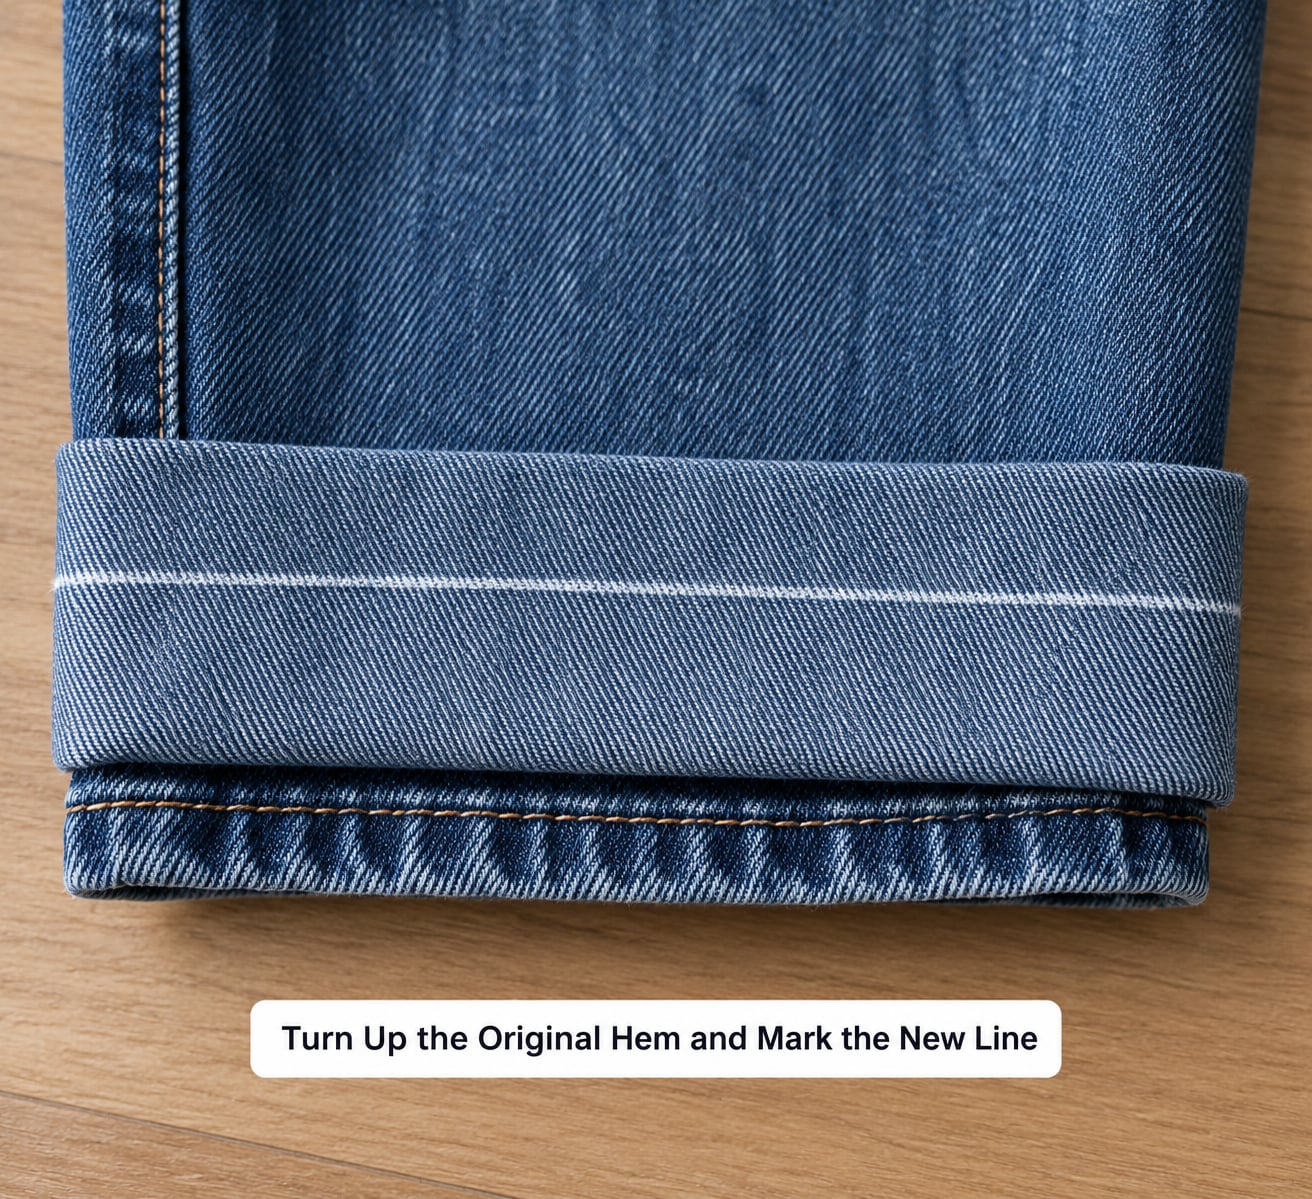
Now the part most tutorials rush. Take the jeans off, turn up the existing hem to the inside of the leg, and press the fold flat so the crease runs true all the way around. That crease is your map.
With the hem folded up, you now have two lines to work with: the fold you just made, and the factory stitching sitting below it. Mark your new stitch line one hem-height above the fold, then mark a second pin line one hem-height above that. The three-line system matters because it tells you exactly where the factory edge will land after you fold it back down.
Chalk every inch around the leg, front and back, and check the marks line up when the leg is laid flat. On a tapered or flared leg, mark with the fabric hanging naturally rather than stretched flat, or you will cut a hem that flares out at the ankle.
3. Remove Only the Excess Denim
There are two ways to handle the fabric above your new line, and the right one depends on how much you are taking up.
If you are removing less than about four inches, leave the denim in place. Fold the original hem up so its edge rests on your stitch line, pin it, and sew through both layers. The extra denim is simply trapped inside the leg, which is exactly how the jeans were made.
Beyond about four inches, the trapped bulk starts showing at the ankle and the hem begins to look heavy. Trim the excess there, cutting from the inside of the leg so the cut edge sits inside the hem rather than at the opening. Leave a quarter inch of allowance so the fold still has something to sew through.
Keep the cut shallow and even around the whole circumference. If the leg opening is much wider than the hem you are re-sewing, the fabric will not lie flat no matter how well you sew it.
4. Fold and Secure the New Hem
Fold the original hem down to the inside of the leg so its original edge lands exactly on the stitch line you marked. Match the factory stitching to your chalk line as you go, and pin every inch or two.
Do not just eyeball one spot. The pin-and-measure habit from experienced sewists works here: measure the same amount from the fold to the chalk at every pin, and you will catch any dip in the crease before it becomes a wavy hem.
Both legs need to match. Lay them side by side and measure from the waistband to the fold on each one before you start sewing.
5. Sew the Hem and Reinforce the Edge
Sew a straight stitch just above the factory stitching, close enough that the two rows read as one deliberate finish. A stitch length of about 2.5 to 3 mm gives a firm seam in heavy denim, and backstitch a few inches at the start and again at the end so the hem cannot unravel.
Slower is the trick on this fabric. When the foot reaches a side seam, hand-wheel the machine through the thick part instead of forcing it, and swap to the bulky seam jumper or a zipper foot so the layers stay flat under the foot.
To reinforce the edge against fraying, switch to a short overcast or zigzag stitch right along the raw cut edge hidden inside the hem, or run a line of pinking shears along it after sewing. Optional but useful: a topstitch in transparent thread along the finished fold stops the hem from flipping out into the leg.
6. Press and Check the Finished Result
Press the hem from the inside first, then from the outside, using high heat and steam. Denim needs real pressure to set a crease, so work over a tailor’s ham or press the seam on a firm surface.
Turn the jeans inside out and inspect the seam allowance around the whole leg. Anything uneven gets clipped, and anything frayed gets overcast now rather than after the next wash.
Then try them on again with your usual shoes. If the hem catches on your shoe or flares away from the ankle, the fold was not even. Unpick only the section that sits wrong, reposition it, and re-sew that stretch.
Common Mistakes
Most disappointing hems trace back to a decision made in the first ten minutes rather than the sewing itself.
- Measuring too high. Mark while standing still and wearing the shoes you will wear. The error is hard to undo once the hem is sewn.
- Cutting through the wrong seam. Cut from inside the leg and leave a quarter inch of allowance. A cut straight through the folded edge removes the factory stitching you came to keep.
- An uneven hem. Pin every inch or two and measure the same distance from the fold at each pin. A curved leg will still need the fabric checked while it hangs naturally.
- Sewing straight over the original stitching. Stitch beside it, not through it. Sewing on the factory seam looks like a repair, not a finish.
- Weak thread or the wrong needle. Ordinary all-purpose thread and needles snap on thick denim. Use a denim needle and heavy polyester thread.
- Skipping the press. An unpressed hem reads as bulky. Give it steam, pressure and time to cool before you judge it.
- Ignoring the bulk limit. More than about four inches taken up needs trimming, or the ankle will carry a visible band.
Frequently Asked Questions
Can I keep the original edge when hemming jeans?
Yes. The original hem is a sewn flap, not a fixed edge, so you can fold it up to a higher line and stitch through both layers. Keep the stitching a few millimetres above the factory seam and the hem reads exactly as it did before. This method works up to roughly four inches of shortening before the trapped denim starts showing.
What is the easiest way to hem jeans for beginners?
Fold the original hem to the inside, pin it on your marked line, sew just above the factory stitching, press hard and trim the excess inside the leg. That single sequence takes about 30 to 45 minutes and needs only pins, chalk, a denim needle and an iron. Beginners do far better preserving the original hem than creating a brand-new one.
Should I cut off the original hem before sewing a new one?
No, not if the goal is to keep the original edge. Cut only the denim above the hem when you are removing more than about four inches, and cut from the inside of the leg so the raw edge stays hidden. Cutting the factory hem off discards the stitching and the faded finish, which is the whole reason for keeping it.
How do I keep a jeans hem from fraying?
Raw denim frays at any cut edge, but the edge you create is usually hidden inside the hem. Press it flat, then run a short zigzag or overcast stitch along it, or trim it with pinking shears. Overcast the internal seam allowance as well, and the hem will survive repeated washing without going fuzzy.
Can I hem jeans by hand without a sewing machine?
You can. Fold the original hem to your mark, pin it, then hand-sew through both layers just above the factory stitching with heavy thread and a denim needle. Backstitch at each end and work in short, even stitches around the leg. Expect it to take three or four times as long as machine sewing, and press the hem well when you finish.
How do I fix a hem that is uneven after sewing?
Unpick only the section that dips, since the stitch line sits close to the factory seam and unpicking rarely damages it. Re-fold the hem so the original edge sits level on your chalk line, check it against the other leg, then re-sew that stretch. If the whole hem is wavy, the crease was uneven before sewing and the entire seam needs to come out.
Conclusion
Start by wearing the jeans and marking the finished length, not by reaching for the scissors. Wash them first, mark three lines with chalk, fold the original hem to your stitch line and pin it all the way around before the machine is switched on.
Everything after that is patience: sew beside the factory stitching rather than over it, backstitch the ends, press with real heat and steam, and trim only what sits hidden inside the leg. Get those three marks right and the original edge survives the alteration intact.